Thanks AutoSpeed
Modifying your car’s air intake system is one of the most cost-effective upgrades you can make. For well under AUD$100 you can fit a big-bore feed pipe into the factory airbox and enjoy improved throttle response together with a smoother, stronger power curve. It’s a process we’ve proven time and time again.
So when we decided to enhance the intake of our ’89 Nissan 180SX the decision was easy – once again, we wanted a big-bore feed pipe into the airbox. The idea was to purchase a ‘universal fitment’ cold air induction system through eBay, bung it into the Nissan and present it as an article. Something along the lines of a low cost, low fuss, ready-to-install system – great for people who don’t want to hunt around for parts and materials.
But it wasn’t to be.
A Big-Bore Feed? Not in this Case...
After stripping the guard liner and various ducts from our 180SX it became obvious there isn’t a lot of useable space in the vicinity of the airbox. A single big-bore feed pipe wasn’t going to fit without absolutely massacring the metalwork, a tortuous pipe route, relocating an under-bonnet fuse box (and probably extending its wiring loom) and blocking the factory airbox intake.
So, yes, it could be done but the final product would’ve looked daggy and we were straying further and further away from the original ‘low fuss’ concept. An alternative approach was needed.
A Secondary Intake Passage – Why Not?
In recent months we’ve seen two performance workshops – MRT and Silverwater Automotive Services - take an innovative approach to intake system modification. Nothing groundbreaking but an approach that looks perfect for our application.
The idea is to leave the factory intake system in place and introduce a secondary intake passage to the airbox. By adding a relatively modest diameter secondary intake passage you can achieve a similar airflow capacity as achieved with a replacement big-bore feed pipe. But there are several advantages to this approach – a secondary intake is easier to incorporate where space is limited (a small diameter pipe is much easier to bend into shape than a big one), it maintains more of the standard under-bonnet appearance and it’s even cheaper than using a big-bore pipe.
This photo shows the air intake system used in a MRT enhanced MY06 Impreza WRX. It might look standard, but that’s not how it performs! In the standard car, induction air enters a pick-up above the radiator, flows into a resonant chamber inside the left front guard and into the airbox. MRT modifies the in-guard resonator so that it becomes a secondary air pick-up – this reduces restriction caused by the standard over-the-radiator pick-up and lowers the pre-turbo intake air temperature.
Similarly, this photo shows the air intake system used in Silverwater Automotive Service’s modified Ford XR6 Turbo. As you can see, the factory over-the-radiator snorkel is supplemented by a secondary intake snorkel that draws air from behind the left headlight. Combined with a K&N air filter, this set-up achieves a huge flow gain over standard.
So that’s the concept. Now let’s examine the design and performance of the 180SX’s existing air intake system.
The Standard 180SX Air Intake Design
It’s all too easy to take a quick look at an OE air intake system and come to the conclusion it’s all cheap and nasty. But the 180SX proves there’s often more to it than meets the eye...
The 180SX air intake begins with curved plastic snorkel that feeds the lower half of the airbox. The entry of the snorkel is sealed against an opening behind the left pop-up headlight assembly – an area separated from under-bonnet heat. Interestingly, there is also a noise suppression section incorporated near the front of the snorkel. A series of holes through the wall of the pipe let induction air enter a small chamber that’s filled with sound absorption material – it works like a muffler.
After passing through a right-angle bend at the end of the plastic snorkel, induction air enters the bottom half of the airbox. Again, the inside walls of the airbox are lined with sound absorption material in a further attempt to reduce induction noise. Not the sort of thing we expected to find in a 180SX – a Lexus or BMW, maybe...
The 180SX air filter is the same as used in the contemporary Nissan Pintara and many other garden-variety cars – a Ryco A360 panel filter. Clamping onto the filter is the top half of the airbox which, unlike the bottom, isn’t lined with sound absorption material. But, as seen in this photo, there is a plastic resonant chamber T’d in.
Also inside the airbox lid you’ll find a bell-mouth entry that improves airflow into the airflow meter. This metal bell-mouth is the same as you’ll find in cars such as a Holden VL Turbo, Pintara and early WRX. After passing through the bell-mouth, induction air enters a hot-wire type airflow meter. This photo shows the meter’s two airflow passages - one very small and another almost 50mm diameter.
The final section of the intake system is the turbo induction pipe. In the 180SX, this pipe incorporates hose fitting for the rocker cover breather and the ‘waste’ air from the boost control solenoid. The pipe has a very smooth internal surface but it does contain a wire spiral that helps the pipe keep its shape.
So that’s the design of the 180SX intake system – how does it perform in terms of airflow and intake air temperature?
Performance of the Standard 180SX Air Intake
With our trusty Magnehelic pressure gauge we were able to the measure pressure drop at various points throughout the 180SX intake system. Testing was performed with the automatic transmission in second gear and with the engine at full power. This table shows the results...
Intake Section Airflow Restriction (Inches of Water)
Plastic snorkel
17
Lower half of airbox and air filter
1
Top half of airbox, airflow meter and part of turbo induction pipe
7
Total
25
From this table it’s obvious that the factory plastic snorkel causes a huge percentage of the overall intake restriction – 68 percent in fact. The bulk of remaining restriction is caused by the section incorporating standard airflow meter and it’s interesting to note that the filter element and post-filter resonant chamber cause bugger-all restriction.
Using a Jaycar LCD temperature meter, we also measured intake air temperature in the lower half of the airbox. With air drawn from behind the left pop-up headlight, the measured intake temperatures typically hover around ambient temperature. Extended idle periods cause the intake air temp to rise about 10 degrees Celsius above the 25 degree Celsius ambient temperature.
So what can we determine from this testing?
Well, we know that we can achieve big gains by improving the airflow into the airbox – the standard intake snorkel is extremely restrictive. But, more importantly, we also know that the intake air temperature encountered using the standard air intake is quite acceptable – by drawing air from behind the pop-up headlight, the pre-turbo intake temperature is close to ambient temperature.
This is probably the most important point in deciding whether a secondary intake passage is the best approach for you.
If we had measured a relatively high intake air temperature there would be no point in adding a secondary air intake – the engine would still be breathing a proportion of hot air. In this case, you are better off installing a replacement big-bore feed pipe that picks up air from, say, inside the wheel arch. Fortunately, the 180SX intake is the perfect recipient for a dual pipe intake.
In the first part of this series we identified that 68 percent of our Nissan 180SX’s total intake restriction is caused by the plastic snorkel feeding the airbox. That’s huge. We also discovered that, due to limited space, it isn’t feasible to install a big-bore airbox feed pipe, so we decided to take the slightly unusual approach of installing a secondary intake passage. Why limit yourself to having only one feed pipe into the airbox?
Now let’s get down to the design and installation.
Designing a Secondary Air Intake
One of the first considerations is how much power you expect to squeeze from the engine – the more power you want, the bigger the cross sectional area of the airbox feed.
If you’re anticipating a power output up to around 200kW you can achieve next-to-zero intake restriction with an airbox feed having a total cross sectional area of 46cm2 – the equivalent of a 76mm (3 inch) diameter pipe. In the case of our 180SX (with a standard output of 130kW), a 46cm2 airbox feed is ample.
In most vehicles, you’ll need to fit a secondary intake passage that feeds directly into the airbox (as shown in this photo). Let’s assume you’re chasing up to 200kW. If the existing airbox feed pipe measures, say, 51mm (2 inches) diameter you’ll need to bore a new hole into the airbox and add a secondary feed pipe with a diameter of 57mm (2 ¼ inches) to meet our 46cm2 goal. The secondary intake pipe should then be routed so that it draws a cool supply of induction air.
In the case of our 180SX, we were fortunate because the standard entry to the airbox is more than big enough to meet our power requirements – it has a cross sectional area of around 70cm2! This meant there was no need to bore an extra hole into the airbox - instead, we were able to connect the secondary intake passage into the rearmost section of the factory intake snorkel.
The rearmost section of the snorkel connects directly to the airbox entry and, therefore, has the same 70cm2 cross sectional area. However, the cross section of the snorkel gets smaller as it nears the air pick-up so it’s important that the secondary intake isn’t installed too far along the pipe.
This photo shows the air pick-up of the factory snorkel which has a cross sectional area of just 25cm2 – the most restrictive part of the entire factory intake. Given the standard pick-up’s 25cm2 cross sectional area, we chose a 51mm (2 inch) diameter secondary intake pipe to achieve a 46cm2 total pipe cross section.
In our 180SX, the inner guard cavity was chosen as the air pick-up for our secondary intake. We chose this area because it is insulated from under-bonnet heat and there are plenty of gaps in the plastic guard liner that allow the inner guard to ‘breath’. It’s also very easy to run a short length of pipe from the rearmost section of the factory snorkel, through the inner guard and into the inner guard cavity.
Installing the Secondary Air Intake
The first step in installing a secondary air intake to our 180SX was to loosen the bolts securing the airbox and remove the factory intake snorkel.
With the snorkel removed, we used a centre punch to mark where we want to run our secondary intake pipe through the inner guard. Care was taken to ensure the new pipe wouldn’t be fouled by the intercooler pipes that exist almost directly beneath.
Using a hole saw, we drilled a 54mm hole through the inner guard. Note that a slow drill speed is required to avoid rapidly blunting the hole saw on metal surfaces.
Once the hole was drilled, we enlarged the opening with a file so that our 51mm flexible hose was a tight push-fit. The edge of the hole was then painted to avoid corrosion.
Next, we grabbed the hole saw (now slightly blunt!) to bore a hole through the bottom wall of the plastic intake snorkel. Again, the hole in the plastic snorkel was enlarged with a file to achieve a tight push-fit with the secondary intake pipe. The newly created hole in the snorkel aligns closely with the hole through the inner guard – almost directly above.
With the necessary holes drilled, we inserted the secondary intake pipe into the factory snorkel, being careful not to excessively penetrate the snorkel and cause airflow restriction. Next, we passed the secondary intake pipe through the hole in the inner guard and reinstalled the snorkel. The airbox was also tightened to its mounts.
After partially removing plastic guard liner, we were then able to route the secondary intake pipe into an open volume inside the guard cavity. This ensures the pipe can breathe effectively without obstruction.
The air pick-up of the secondary pipe was secured in position using a cable tie and the plastic guard liner was reinstalled.
Job done!
Results
So how does our 180SX’s secondary air intake perform? Pretty well, even if we say so...
With the Magnehelic gauge again hooked up to the intake we saw pre-airbox restriction slashed from 17 inches of water to just 4 inches of water. This represents a 52 percent drop in the overall intake restriction – we’re now down to 12 inches of water from 25 inches of water! Intake air temperatures remain pretty close to ambient but there does seem to more resistance to temperature rise during extended idle periods.
Hand-timed 0 – 100 km/h acceleration is also improved from 7.6 seconds to between 7.5 and 7.4 seconds. And, finally, the intake mod is stealth - you’d never know someone had fiddled around with it unless you look r-e-a-l-l-y hard.
Not bad given the upgrade cost less than AUD$10 in materials and took only a couple of hours labour! Step aside big-bore airbox feed pipes that replace the factory system – you’ve just been aced.
Stock air-box (good read)
Moderators: P3g4sus, Daniel, rat, Draco, Riekert
-
Pinkfluffybunnys

- Over Boosting
- Posts: 1693
- Joined: Thu May 08, 2008 1:21 pm
- Car: Other
- Engine: SR
- Real Name: Ashley
- Location: Pretoria
Stock air-box (good read)
2008 Mazda 6 MPS - Daily Drive
1\4 Mile:
1993 Nissan Sentra 200STI SR20VE – Mild VE
1\4 mile: 14.815 @153km\h @ ODI --- 1KM:195Km\h
Because Race Car
1\4 Mile:
1993 Nissan Sentra 200STI SR20VE – Mild VE
1\4 mile: 14.815 @153km\h @ ODI --- 1KM:195Km\h
Because Race Car
-
Slide 'em Wide

- 0.6 Bar Boost
- Posts: 682
- Joined: Thu Jan 10, 2008 4:31 pm
- Car: S13
- Location: Jo'burg

-
Ero_sennin
- SX Forumholic
- Posts: 1717
- Joined: Tue Aug 01, 2006 4:00 pm
- Car: S13
- Engine: SR
- Location: Will always be called Pretoria
- Contact:
-
mario_200sx

- 200SX Maniac
- Posts: 2507
- Joined: Fri Dec 14, 2007 9:16 am
- Car: S13
- Location: Cape Town
-
Riekert

- The Overlord
- Posts: 9505
- Joined: Tue Jul 31, 2007 11:51 pm
- Car: S13
- Engine: VQ
- Real Name: Riekert
- Location: Hermanus/Cape Town
- Contact:
Awesome! that site is very cool!
Nice thing is I'm also running my stock airbox... with a k&n and a whole with a pipe going to the front...
Nice thing is I'm also running my stock airbox... with a k&n and a whole with a pipe going to the front...
Enzio wrote:Who needs ligths? When you're going sideways forward facing lights don't do anything but confuse squirrels and sheep next to the road...
aka The Overlord

Good find there!
I allways thought : the engineers put allot of effort into a factory airbox.Just slapping on a cone sounds nice,but most of the time hp and torque is lost.Especially in our lovely high temped RSA-heat soak is such a bitch!
Karis
I allways thought : the engineers put allot of effort into a factory airbox.Just slapping on a cone sounds nice,but most of the time hp and torque is lost.Especially in our lovely high temped RSA-heat soak is such a bitch!
Karis
S13 200sx Maroon.T28 Turbo.Apexi Piggy Back.FMIC.Aftermarket Exhaust.

intake temperature shempreture...
After the 3" exhaust the BIG conefilter was probably the best bang for buck mod on my car so far. Felt like a different beast altogether - and that sound! oh yeah...
Then again I don't do much traffic driving so heat soak was never a concern to me.
Intake mods however remain one of the best mods you can do as the article rightly stated.
With the factory IC out of the way the next thing to do would be to scoop some cold air from behind that left bumper intake and route it to the cone.
-
Ero_sennin
- SX Forumholic
- Posts: 1717
- Joined: Tue Aug 01, 2006 4:00 pm
- Car: S13
- Engine: SR
- Location: Will always be called Pretoria
- Contact:
Yup a very nifty thing indeed, no cutting needed of the body work!Doctor G wrote:intake temperature shempreture...
With the factory IC out of the way the next thing to do would be to scoop some cold air from behind that left bumper intake and route it to the cone.
SONY Xplod inside
SR20DET Powered Red RS13

SR20DET Powered Red RS13
-
Toby

- Club Founder
- Posts: 1874
- Joined: Tue Aug 01, 2006 10:44 am
- Car: S13
- Real Name: Toby Kurien
- Location: Midrand
- Contact:
"big improvement" being:WarrenS13 wrote:LazyGary57 wrote:Too long to read, any one care to give the crux??
Before = lots of restriction
Not enough room for big bore pipey thingy so install secondary intake passage pipe into the airbox= big imrovement!
NOTE - hand timed, which means give or take 0.3 seconds at least. Amazing what a massive restriction the stock airbox is, huh?Hand-timed 0 – 100 km/h acceleration is also improved from 7.6 seconds to between 7.5 and 7.4 seconds
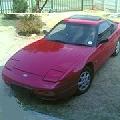
Red 200SX S13, 1992, stock. <a href="/phpBB3/viewtopic.php?t=332">Engine rebuilt (click)</a>.
-
Pinkfluffybunnys
- Over Boosting
- Posts: 1693
- Joined: Thu May 08, 2008 1:21 pm
- Car: Other
- Engine: SR
- Real Name: Ashley
- Location: Pretoria
