Replacing Instrument Cluster Lights (56k warning)
Moderators: P3g4sus, Daniel, rat, Draco, Riekert
-
- SX Forumholic
- Posts: 1717
- Joined: Tue Aug 01, 2006 4:00 pm
- Car: S13
- Engine: SR
- Location: Will always be called Pretoria
- Contact:
Replacing Instrument Cluster Lights (56k warning)
Ok after quit a while and many people asking me about this, I have finaly decided to get my ass into gear and do a writeup on this.
I have used pics from another site from someone removing the whole dash of a left hand drive model, but its all the same any way.
I might have missed something as I did this more than a year ago, so let me know if I did!
First I needed to decide on what colour lights I wanted, I decided on blue.
My original Idea was to have red needels as well, it is slightly imposible with stock cluster.
I went to ebay and ordered myself a few of these:
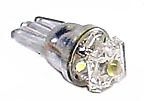
You need three for the cluster. 168 Wedge type, these are 5 led ones.
Stay away from the bulbs you buy at the "styling" corner shops. They are not bright enough, the blue ones were I think 3W and you could hardly see the cluster light up Red ones were 10w and worked ok, but was still not bright enough for me.
Now for my favourite part, dismantleling everything!!
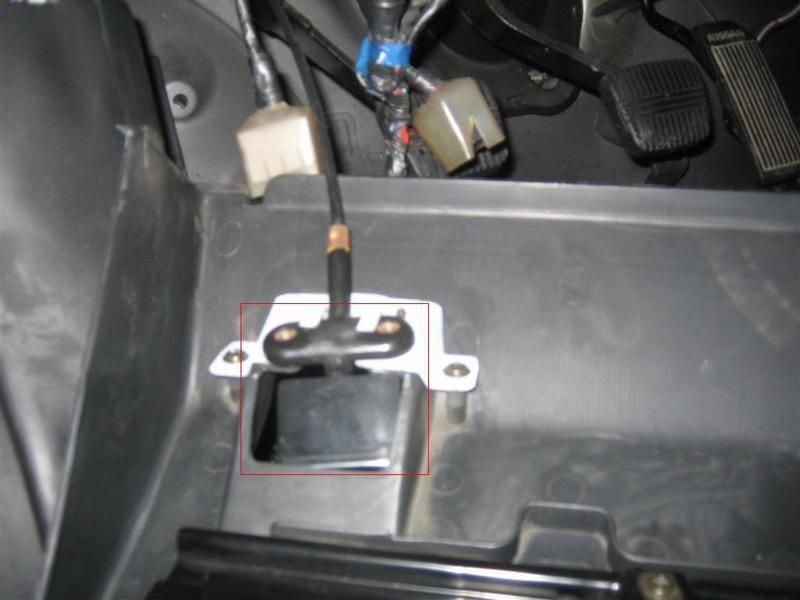
Start by taking off the panel below the steering wheel, two holding the bonet release, four screws at the top and one on each side. Indicated by red circles:
You may remove the plastic cover over the steering wheel and controls, altho I didn't have to do this
Pull each button out and unclip each harness from the button and put them aside.
Undo the screws holding cluster bezel
lower the steering wheel with the lever
unclip clips on cluster bezel
Pull the cluster bezel out over the steering, you might have to force/bend it a little if you didn't remove the plastic pawl of the steering. Be careful not to break it
Undo the screws holding the cluster.
Pull out cluster and unclip the plugs on the back of the cluster
On the back of the cluster there will be three red "knobs" you turn them out and replace the lights.
I had to check how they go in and what direction the leds shine on to the refractors inside and slightly bend the leds to shine more towards these, I have read that people use sand paper and slightly "scratch" the leds to difuse the light beter.
Then do every thing in reverse order and you are done.
Just be carefull not to break anything!
The Result:
For those wondering the cluster dimmer/brightner button still works.
I have used pics from another site from someone removing the whole dash of a left hand drive model, but its all the same any way.
I might have missed something as I did this more than a year ago, so let me know if I did!
First I needed to decide on what colour lights I wanted, I decided on blue.
My original Idea was to have red needels as well, it is slightly imposible with stock cluster.
I went to ebay and ordered myself a few of these:
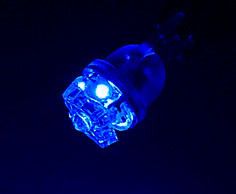
You need three for the cluster. 168 Wedge type, these are 5 led ones.
Stay away from the bulbs you buy at the "styling" corner shops. They are not bright enough, the blue ones were I think 3W and you could hardly see the cluster light up Red ones were 10w and worked ok, but was still not bright enough for me.
Now for my favourite part, dismantleling everything!!
Start by taking off the panel below the steering wheel, two holding the bonet release, four screws at the top and one on each side. Indicated by red circles:
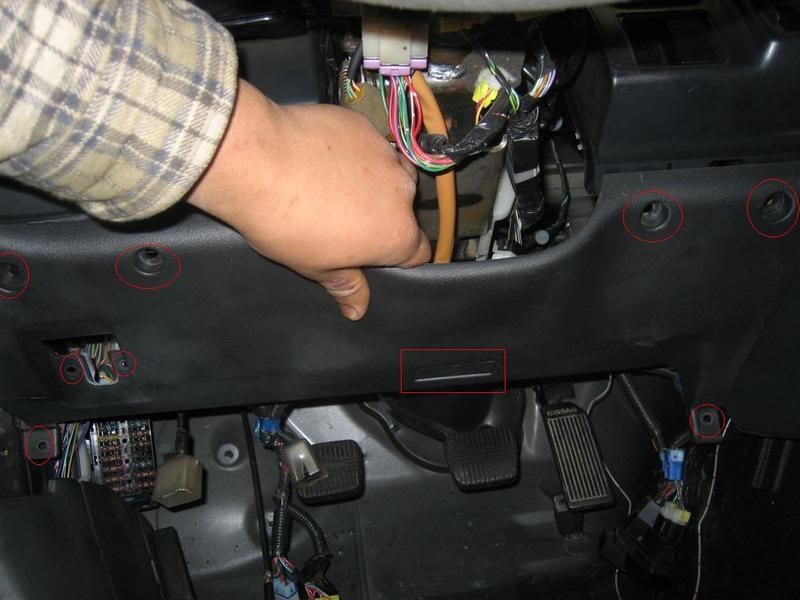
You may remove the plastic cover over the steering wheel and controls, altho I didn't have to do this
Pull each button out and unclip each harness from the button and put them aside.
Undo the screws holding cluster bezel
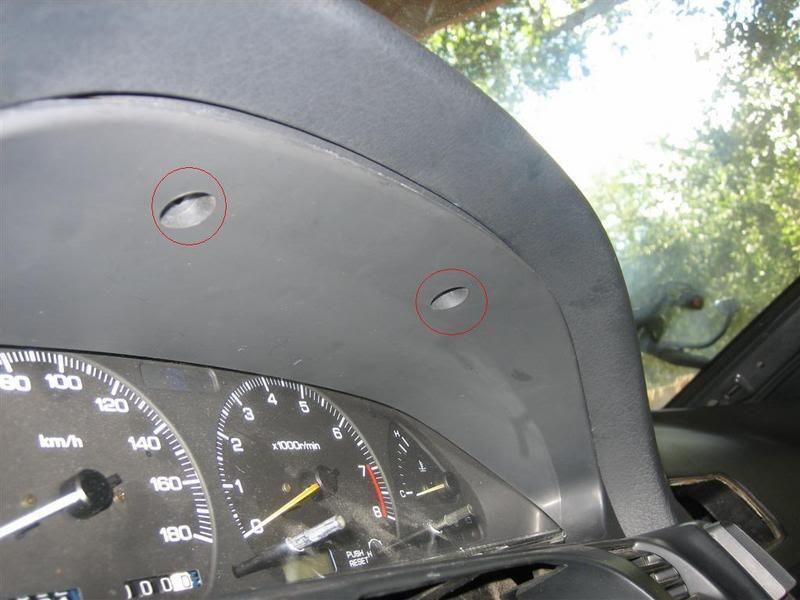
lower the steering wheel with the lever
unclip clips on cluster bezel
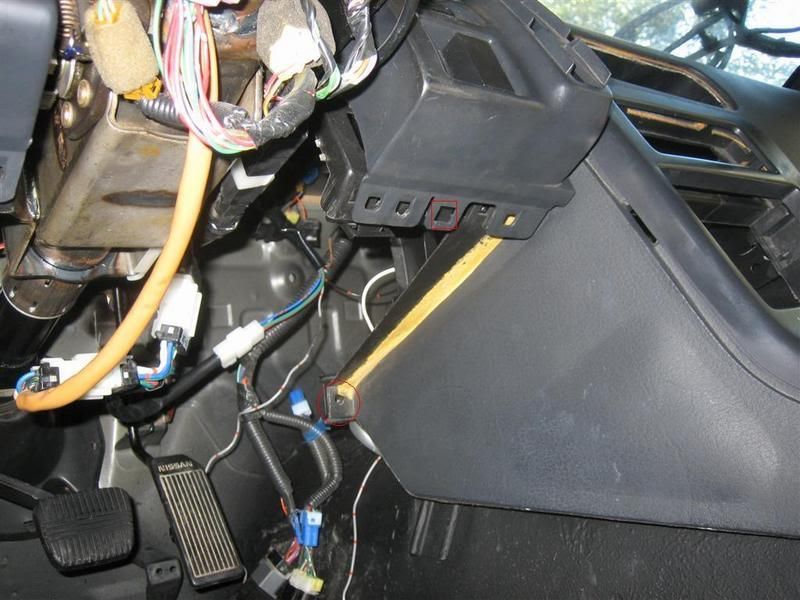
Pull the cluster bezel out over the steering, you might have to force/bend it a little if you didn't remove the plastic pawl of the steering. Be careful not to break it
Undo the screws holding the cluster.
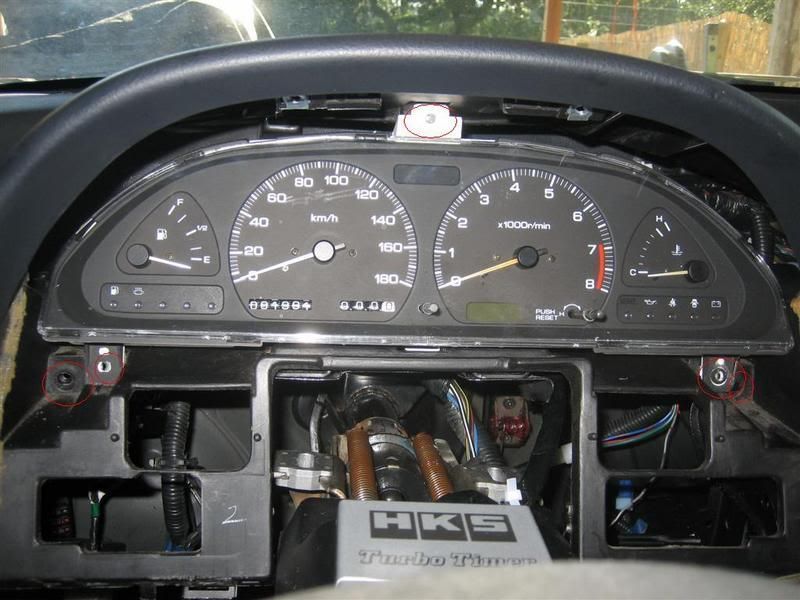
Pull out cluster and unclip the plugs on the back of the cluster
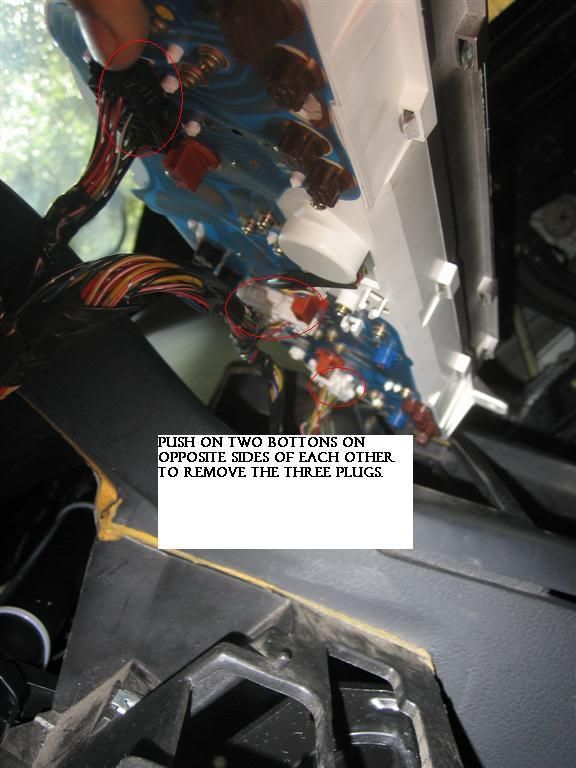
On the back of the cluster there will be three red "knobs" you turn them out and replace the lights.
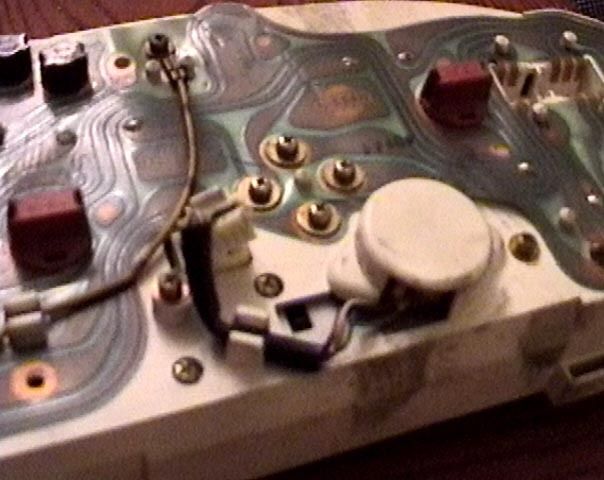
I had to check how they go in and what direction the leds shine on to the refractors inside and slightly bend the leds to shine more towards these, I have read that people use sand paper and slightly "scratch" the leds to difuse the light beter.
Then do every thing in reverse order and you are done.
Just be carefull not to break anything!
The Result:
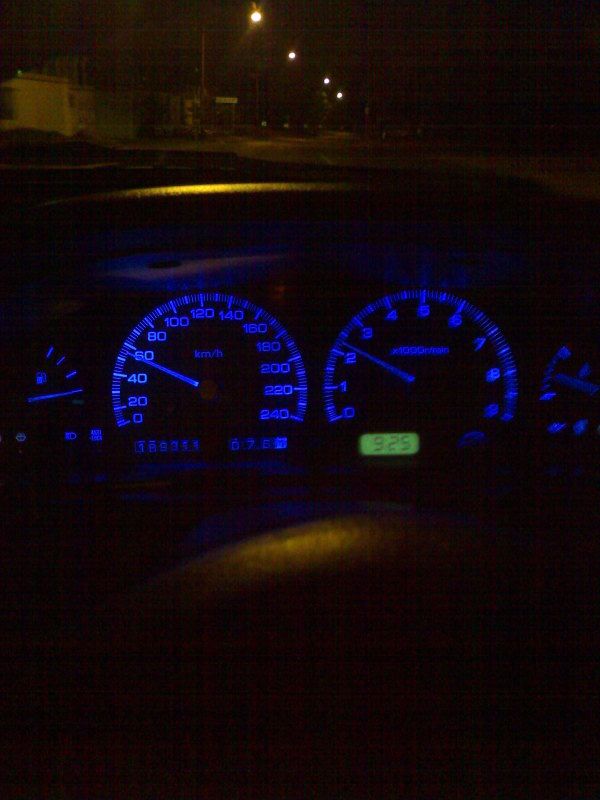
For those wondering the cluster dimmer/brightner button still works.
Last edited by Ero_sennin on Thu Feb 07, 2008 9:07 pm, edited 1 time in total.
SONY Xplod inside
SR20DET Powered Red RS13
- widowmaker
- 200SX Maniac
- Posts: 3051
- Joined: Wed Aug 02, 2006 9:50 am
- Car: S13
- Real Name: Walter
- Location: im from another planet?
- Contact:
yeah they look very nice...
and i saw stephen's s14 last night with the same mod. looks even better in person, unlike most movie stars!
do any of you electronics wizzkids know how to change the backlight colour of the digital clock???
and i saw stephen's s14 last night with the same mod. looks even better in person, unlike most movie stars!
do any of you electronics wizzkids know how to change the backlight colour of the digital clock???
ReeceZ wrote:I'm sorry... I couldn't help it. Please no one wish any hateful shit on me, I own an SX already
- widowmaker
- 200SX Maniac
- Posts: 3051
- Joined: Wed Aug 02, 2006 9:50 am
- Car: S13
- Real Name: Walter
- Location: im from another planet?
- Contact:
-
- SX Forumholic
- Posts: 1717
- Joined: Tue Aug 01, 2006 4:00 pm
- Car: S13
- Engine: SR
- Location: Will always be called Pretoria
- Contact:
If a remember well enough the clock uses one of the smaller light bulbs, not sure what size that is, probably wedge type size 50 or something not sure.veecee wrote:yeah they look very nice...
and i saw stephen's s14 last night with the same mod. looks even better in person, unlike most movie stars!
do any of you electronics wizzkids know how to change the backlight colour of the digital clock???
SONY Xplod inside
SR20DET Powered Red RS13
-
- SX Forumholic
- Posts: 1717
- Joined: Tue Aug 01, 2006 4:00 pm
- Car: S13
- Engine: SR
- Location: Will always be called Pretoria
- Contact:
I was hoping for 20kw extra, but I'm not gonna photo graph evidence of me getting the speed needle to go as far as possible.widowmaker wrote:58km/h?
not much of a performance upgrade then...
OH! the lights! b-e-a-u-t-i-ful
nice job
Especially going at that speed and still using the crappy cell phone to take a picture
SONY Xplod inside
SR20DET Powered Red RS13
-
- SX Forumholic
- Posts: 1717
- Joined: Tue Aug 01, 2006 4:00 pm
- Car: S13
- Engine: SR
- Location: Will always be called Pretoria
- Contact:
Nope didn't break anything, I wasn't in a hurry tho, the engine was fooked and I was bored, I did this over a period of 2 weeks as I waited for the lights to be delivered.Toby wrote:Ero... did you break any clips in the process?
Mostly every thing is just screwed in, the only thing's that have clips are the bezel and the switches.
veecee wrote:if you do things properly, you shouldn't. if you're unlucky, like most people with sx's! you will...
but they shouldnt be a problem to find!
are those globes available locally???
I couldn't find anything locally that was bright enough, styling shops had 3 w to 10 w coloured globs, that are defiantly not bright enough (the red ones were ok @ 10w, visible but not that bright), I found Led ones but it was 1 LED lights and that shines forward and the light is "sourced" from the sides so that wouldn't work either.
Auto style have normal replacement globes, but that wont change the colour.
So my only option was to get online, after I saw the result online using the leds I used, I just had to buy them.
I didn't go to any places like communica or other electronic shops, so not sure what they would have.
SONY Xplod inside
SR20DET Powered Red RS13
- widowmaker
- 200SX Maniac
- Posts: 3051
- Joined: Wed Aug 02, 2006 9:50 am
- Car: S13
- Real Name: Walter
- Location: im from another planet?
- Contact:
-
- SX Forumholic
- Posts: 1717
- Joined: Tue Aug 01, 2006 4:00 pm
- Car: S13
- Engine: SR
- Location: Will always be called Pretoria
- Contact:
- Riekert
- The Overlord
- Posts: 9505
- Joined: Tue Jul 31, 2007 11:51 pm
- Car: S13
- Engine: VQ
- Real Name: Riekert
- Location: Hermanus/Cape Town
- Contact:
Removing the dails is quite easy... I've done it a few times to clean the plastic cover in front of the dails... also changed the globes to red ones... but it wasn't bright enough... so took them out again!Toby wrote:Ero... did you break any clips in the process?
What did those lights cost you ero?
Enzio wrote:Who needs ligths? When you're going sideways forward facing lights don't do anything but confuse squirrels and sheep next to the road...
aka The Overlord
-
- SX Forumholic
- Posts: 1717
- Joined: Tue Aug 01, 2006 4:00 pm
- Car: S13
- Engine: SR
- Location: Will always be called Pretoria
- Contact:
Was about between R100 - R200 I think, for four and then shipping.Riekert wrote:Removing the dails is quite easy... I've done it a few times to clean the plastic cover in front of the dails... also changed the globes to red ones... but it wasn't bright enough... so took them out again!Toby wrote:Ero... did you break any clips in the process?
What did those lights cost you ero?
because I think they were between $10 and $20.
SONY Xplod inside
SR20DET Powered Red RS13