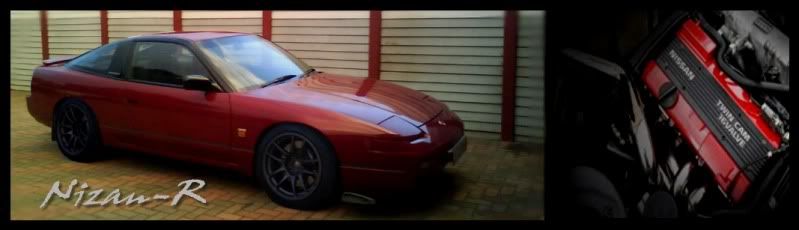
I will hopefully have some pics online by tonight.
Let's start at the beggining. I saw the car for sale on the forum and I was in the area at the time to go have a look at it. It was not in 100% condition but was very close. Mechanically I was not to worried since I had been planning to do some stuff to the engine in any case. I decided then and there I wanted it.
When I got the car home I fixed a few of the electrical problems , basically just the rear lights and driver side power windows. The rear lights were extremely dim even at night, so took off cover to see what was going on. It seems like whoever replaced the bulbs swapped the orientation so they were nowhere close to the reflectors. Easy fix
Next I took out the driver side window amp. Took it apart and found some of the solder joints were no longer connected to the PCB. Quick resolder and that was sorted as well. Will have some pics of how I did this.
After driving around with the little CA I found it was also very floaty at speed and was scraping everything on the road. It felt like the suspension was bottoming out on even the tiniest little bump. So after I spoke with the bank manager I got myself I nice set of BC Coilovers from RB25SX (Thanks again!)
The suspension is bloody fantastic. I would reccomend them to anyone.
This all happend on the second month of me owning the car.
On the third month tragedy struck. I was on my way back from visiting my parents and I lost power to the engine and some smoke from the front. I feared the worst.... After a "quick" tow to my house we started with the diagnosis. There was no compression on 3 of the 4 cylinders, the 4th cylinder bearly read 50psi the others were not even on the scale. We suspected either headgasket or maybe bent valves. Luckily the valves and head seem to be in 100% condition.
So now I am busy with an engine rebuild and some upgrades while everything is out of the engine bay
While I am at it. I am going to replace the SMIC with a FMIC, and replace the Atmospheric BOV with a Recirc BOV. I am still running the stock MAF. No idea why it was running with an atmospheric BOV
Now I need some help from you guys.
I am looking for an engineering place in the Pretoria Central & East area, that does nice work. I am looking to balance the bottom end and skim the flywheel. As well as rebuilding the head and skim. While also replacing valve guides and oil seals. I don't have a spring compressor that works with the CA head.
Can you guys think of anything else I need to do?
Thanks again for reading and any assitance !
![[smilie=200sx_200sx.gif]](./images/smilies/200SX_200SX.gif "200SX_200SX")


