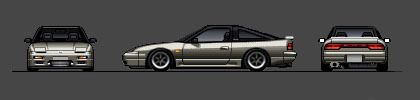
Yeah seeing Toby driving off with the car yesterday was such a blessing, it made my day, really happy to see the car running. I think me and Toby did a great job, it was done the way I like things to be done, no short cuts, took our time on things, neat and clean work.
Got small little issues to sort out like the never ending leaking injectors but I think when that is solved, I'm confident that it will clock 1000's of kilometers.
There is a good reason why we took 5 months on this project.... If you read the thread from start to finish... Initially we where not going to do certain things, as we realized certain things along the way, we had to stop what we doing solve the issue and then continue, each time this took 2 weeks out of the game. In the end a lot more was done to the motor than initially planned, one can say its brand new, no part was left unchecked an uncleaned

I think its going to be well worth the money and time spent on it.
Well mate all I can say is enjoy...
PS: For those of you that are also rebuilding engines and things take note of what was done.
* Serviced head: The head was in a good condition, but I persuaded Toby to sent it in for a service. I'm glad we did, this also confirms to rule no 1 when removing heads, if a head has been torqued to a block and was heated you need to skeem it, to make sure the surface is 1000% flat.
* Grinded crank: journal wear threshold was on MAX of the standard size, leaving them just standard would have resulted in problems in the far future when the crank moves out of the maximum threshold, thus we regrinded and moved to the next bearing size.
* Bored block: The block had some scratches due to stuck rings, we initially thought we where going to hone it our selfs, I have never attempted this my self and the result was not as expected. Thus we sent it in to the engineers for them to hone. The scratches was too deep and could not be honed out thus a rebore was needed. Moved on to next pistons size, new pistons.
* Little ends replaced: This was our mistake due to a faulty installation we noticed that the one little end was a very sticky, we damaged the bearing and ended up sending them to the engineers to replace.
Once the bottom end was assembled we turned the engine by hand and checked that everything was turning freely and that no parts were inter fearing, especially the oil squirter's. (Note to self: fit oil squirter's after installing pistons)
The head and timing gear went on... I have done this a million times before but we still went ahead and turned the engine by hand to check if everything was turning freely, you need to double check your own work.
During the build we had the FSM on the laptop by our side the whole time, even though I'm experienced in building a CA18, I still kept on double checking torque values, installation procedures, etc. When in doubt RTFM (Read The F#cking Manual).
The engine works as a whole and no short cuts can be taken doesn't matter how big or how small it might be... I learned hard lessons before, nearly everyone on the forum knows this... I'm glad we took the route we took and I'm sure it will pay out.
Now... whats next...