Project D - 1 DEC 2007

How-to's, project cars, and various other articles posted by club members

Moderators: P3g4sus, Daniel, rat, Draco, Riekert

Post Reply
User avatar
Vlade
* - Club Pimp - *
Posts: 2775
Joined: Thu Oct 19, 2006 9:40 am
Car: Other
Real Name: Barend
Location: Auckland, New Zealand

Project D - 1 DEC 2007

Post by Vlade »

Are you ready...? 8)

This topic will cover my CA18 motor rebuild and other things that will be happening to my car in the next few months...

What is planned?

* Full engine rebuild with the underlying parts
- Exedy clutch
- CP Pistons
- ACL MLS head gasket
- ACL Race bearings
- ACL Race gaskets
- New Water pump + Oil Pump
- Rebore & regrind crank
- Recon head
- Skim fly wheel
* Fit Energy Suspension poly bushes
* Fit custom made solid rear sub frame bushes
* Build new Power Brace - Like Nismo item
* Lower my STS buckets
* New Nismo like engine mounts and gearbox mounts
* New radiator + hoses
* Fit Oil Cooler
* All braided hoses for Turbo coolant

The reason why I'm doing my engine rebuild, I fitted an import engine somewhat 18 months ago, most gaskets and seals in this engine has seen better days, I decided if I'll rebuild an engine why not do it decent and do it right, thus some of the mentioned parts being fitted

Enough with the boring stuff here is the pictures... and progress...

Image
My Current engine and engine bay

Image
Cleaned and sanded cam covers

Image
Newly resprayed cam covers

Image
Parts that needs to be fitted

Current progress
* All engineering work is done
* Found out there was a damaged ring on one of the pistons (think engineers damaged it) ordering a new set from Rezlo
* Bought all steel to start build power brace
* Started in lowering the seats

Image
This is my current seat rails for the STS seats, they work fine they just sit very high in the car aprox 5-8cm higher than the stock

Image
This is the right driver side rail, note the brackets that hold the rail up, and the origianal rail mountings, this was a bitch to make and took me a whole day of test fitting and welding

Image
Driver side left rail, using STS rails and original mountings, I need to work on my welding

Image
Original rail & new rail, the new rails are about 5cm lower than my old ones which is cool

Image
CA18DET engine block bored to 0.2" oversize - Engineering work by Basil's Engineering

Image
Another pic of the block

Image
Bottom of block, note the oil squirt mounts, important that these are clean and free of deposits, if the oil squirts get blocked, you will run bearings, before any of the parts will be fitted I'm going to connect a high pressure cleaner to the block's oil inlet and check that all outlets are free of any gunk

Image
Head skimmed and reconned by JR Cylinder heads in JHB

Image
Flywheel from my old motor - it needed to be skimmed, was badly worn

Image
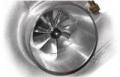
Test fitted my braided hoses for the turbo, little worried about the water inlet think the one banjo is not aligned right

Image
Grinded crank and my rods that where checked and balanced - no balancing was needed

In this week there isn't much I can do, I'll clean the block and all parts going in, will finish my seats, still have to do the passenger side it took a whole Saturday to do the driver side seat...

More to come soon, so hold on to your panties...
Last edited by Vlade on Mon Dec 03, 2007 9:12 am, edited 19 times in total.
Hairdresser MX5

User avatar
Toby
Club Founder
Posts: 1876
Joined: Tue Aug 01, 2006 10:44 am
Car: S13
Real Name: Toby Kurien
Location: Midrand
Contact:

Post by Toby »

WOW... all this work must cost a pretty penny... :shock:

PS: I like the reference to Initial-D fourth stage - have you seen the live action Initial-D movie?
Red 200SX S13, 1992, stock. <a href="/phpBB3/viewtopic.php?t=332">Engine rebuilt (click)</a>.

User avatar
Vlade
* - Club Pimp - *
Posts: 2775
Joined: Thu Oct 19, 2006 9:40 am
Car: Other
Real Name: Barend
Location: Auckland, New Zealand

Post by Vlade »

Yeah it took a year to source some of the parts and funds to buy everything...

I'm a huge fan of Initial D... Got Stage 1 to Stage 4, movie & live action movie at home.. 8)
Hairdresser MX5

User avatar
Gary57
Club Rep
Posts: 5976
Joined: Thu Oct 12, 2006 12:56 pm
Car: S13
Location: Durban

Post by Gary57 »

What power are you hoping to make??

User avatar
Phinx
0.7 Bar Boost
Posts: 720
Joined: Fri Oct 20, 2006 12:30 pm
Car: S13
Location: Pretoria

Post by Phinx »

Vl@de are you doing all the work yourself?

looks really sweet man
A.K.A - Wonderboy
~~~~~~~~~~~~~~~~~~~~~~~~~~~~~
1993 Nissan 200 SX
148 Kw - 250 NM @ 0.55 bar. 1.8T ATW
~~~~~~~~~~~~~~~~~~~~~~~~~~~~~
1989 Toyota Corrola
63kw - 117nm 1.3- N/A
18.2 @118,4 Km - Rainbow Raceway
~~~~~~~~~~~~~~~~~~~~~~~~~~~~~

User avatar
Vlade
* - Club Pimp - *
Posts: 2775
Joined: Thu Oct 19, 2006 9:40 am
Car: Other
Real Name: Barend
Location: Auckland, New Zealand

Post by Vlade »

Funny thing is with over R10K of parts going in, I'll get nearly no increase in power, the whole idea is to build a semi-race engine that will handle nearly anything I throw at it.

Later on maybe end next year (thats when I'll have enough money again :) ) I'll look into upgrading the turbo, but before that can be done there is a few other things that needs to be done
* Fuel pump upgrade
* Fuwl pressure regulator
* Bigger injectors

I'll slowly do those as funds become available, but before that LSD & Coilovers are top priority... The GT2860RS will have to wait

My goal one day is 300whp but that will come much later...[/list]
Hairdresser MX5

Slade2000
Slipping Clutch
Posts: 10
Joined: Fri Nov 17, 2006 9:56 am

Post by Slade2000 »

HOwdi.

Just for interest sake.

Me and Vlade has been friends for more than 7 years now and belief me if he do something there will be hardly any body able to do a better job.
The idea with this car is not to see how much power he can get, it is to be able to drive from PTA to CT at 7000rpm all the way and still go race a few cars on the track the Saturday and the Sunday go drifting through Clifton streets and race a Porsche back to PTA and still be able to drive it every day.

Good luck tjom.

User avatar
Toby
Club Founder
Posts: 1876
Joined: Tue Aug 01, 2006 10:44 am
Car: S13
Real Name: Toby Kurien
Location: Midrand
Contact:

Post by Toby »

So.. more like Mission Impossible than Project D, then :lol:
Red 200SX S13, 1992, stock. <a href="/phpBB3/viewtopic.php?t=332">Engine rebuilt (click)</a>.

User avatar
Vlade
* - Club Pimp - *
Posts: 2775
Joined: Thu Oct 19, 2006 9:40 am
Car: Other
Real Name: Barend
Location: Auckland, New Zealand

Post by Vlade »

Noo its possible.. Its gonna be one strong CA18

Updates now:
Still busy with my seats blerry rain has been hampering my efforts this week in getting it done.

Martin (aka Slade) and me built a sandblasting box from a cardboard box and pieces of cutoff glass (some pics tomorrow) 8)
This was used to sand blast this

Image
Into this
Image

I just have to remove the old gaskets... Which if you have done it before you'll know what pain in the ass it is... If you know of a easy way of removing it let me know.

Also spoke to Martin and tossed the idea of sandblasting my spare sump... Will just need to repaint it after words.

More to follow soon... Think things will pickup as soon as the rest of the parts arrive..
Hairdresser MX5

User avatar
Vlade
* - Club Pimp - *
Posts: 2775
Joined: Thu Oct 19, 2006 9:40 am
Car: Other
Real Name: Barend
Location: Auckland, New Zealand

Post by Vlade »

Also took my radiator in today, don't thing its gonna be a cheap thing to replace

Image
My current radiator and the dual 10" fans, its leaking at the bottom inlet

Here is our home built sandblasting box... it did the job

Image
I held that pose for nearly 8 hours.... my back was non existent

Image
Top pic of the box
Hairdresser MX5

User avatar
Gary57
Club Rep
Posts: 5976
Joined: Thu Oct 12, 2006 12:56 pm
Car: S13
Location: Durban

Post by Gary57 »

What seats are those??

Why dont you have the block sand blasted and clear coated??

User avatar
Vlade
* - Club Pimp - *
Posts: 2775
Joined: Thu Oct 19, 2006 9:40 am
Car: Other
Real Name: Barend
Location: Auckland, New Zealand

Post by Vlade »

Seats are STS ones that I got from ATS Racing Equipment... Not ideal for big people as its quite tight, but they fit me perfectly.

The block is already machined and painted black, would be too much of a risk to sandblast it now... I'll sandblast some more stuff Friday so everything will be ready for fitment.
Hairdresser MX5

User avatar
Vlade
* - Club Pimp - *
Posts: 2775
Joined: Thu Oct 19, 2006 9:40 am
Car: Other
Real Name: Barend
Location: Auckland, New Zealand

Post by Vlade »

Started with the initial engine build last night, still awaiting some parts... but I started with it anyway

Image
Fitted the ACL Race bearings, funny looking ones they not the usual silver, when fitting bearings don't use tools to tap them into place, they are soft and can damage easily, push them in with your fingers, and make sure they are nice and flush with the block, same goes for the bearing caps

I made sure to give them a nice good layer of decent mineral oil - never use synthetic oil on a newly build engine! I bought some assembly lubrication but never used it... :cry:

Image
Fitted Water pump, Oil Pump, Crank & casing and oil squirter's

Image
Tucked away and ready for bed
Hairdresser MX5

Hennie Marais
0.3 Bar Boost
Posts: 386
Joined: Wed Nov 29, 2006 11:23 am
Car: S13
Location: Rustenburg

Post by Hennie Marais »

Very nice, my rebuild will start once the bike is finished. I love these CA18's

User avatar
jon
0.7 Bar Boost
Posts: 758
Joined: Wed Nov 29, 2006 12:05 pm
Car: S13
Location: Midrand

Post by jon »

Wow, looking great so far. Good luck although with all the hard work you putting in I'm sure luck won't be neccessary :D

Post Reply